Background:
If you are a Java developer who is comfortable using Eclipse (JEE Developer version) you may be asking yourself where to start with AngularJS. There is all kinds of documentation out there in regards to AngularJS and https://angularjs.org/ provides, to the point, tutorials on how to get started. You can certainly go that route and use node.js embedded server and possibly a Javascript focused IDE like WebStorm. However I wanted to try and stay in a comfort zone, my comfort zone, of Eclipse and be in a position to deploy an Angular application to a container like Tomcat. This blog entry will present the trail I took to try and accomplish it.Note: This is an adventure into Angular 1.x, not 2.x. I would imagine this could all work with 2.x as well as it is focused on the dev environment setup.
Start:
Well the one consistent thing you will find to get started is to install the AngularJS Plugin, provided by Angelo ZERR. You can use the Eclipse 4.5 (Mars) plugin install feature to configure an update site for the AngularJS plugin and perform the install. Within Eclipse go to Help -> Install New Software. Click on the "Add" button to add a new configuration for the AngularJS download site. In the add dialog for the name specify whatever you like, "Angular JS Plugin Site", for the location use http://oss.opensagres.fr/angularjs-eclipse/1.1.0/ . Version 1.1.0 was the latest update at time of writing and it was released 11/2015.The first thing that may be a little confusing as you proceed is you will see that there are multiple items that will be presented during the install:
- AngularJS Eclipse Tooling
- AngularJS Eclipse Tooling Development Resources
- AngularJS support for JSP
- AngularJS support for PHP (PDT)
- Tern - Embed Node.js
- Tern IDE
- Tern Tooling
- Tern Tooling Development Resources
- WTP HTML - Web Resources
and with each release of the plugin there seems to be additional items with documentation on the plugin WIKI lacking a bit behind.
Here is the description from the plugin website https://github.com/angelozerr/angularjs-eclipse/wiki/Getting-Started . Note as of 03/28 the documentation below only covered items as of version 0.5.0 of the plugin. You can see from above there are many items that are not detailed in the documentation. If you read through all the release notes you can probably piece everything together, but that can be pretty tedious.
- AngularJS Eclipse Tooling which is AngularJS Eclipse plugins .
- AngularJS support for JSP if you wish to use JSP with AngularJS.
- Tern - Embed Node.js if you have not node.js installed on your computer. Node.js is required to execute tern.js.
- Tern IDE to use tern with Eclipse IDE.
- Tern - Tooling if you want to generate tern plugin, JSON Type Definition or Web Browser editor (CodeMirror, Ace, Orion) with tern. For more information please read Tern Toolings
I'm not sure I will ever really do anything with AngularJS support for JSP, or PHP, or Development Resources, or Tern - Tooling (to extend the built in Tern IDE); but there is not a lot of harm in just installing them. Proceed through the install steps, license acceptance, security warning (click OK) and then restart your Eclipse.
Demo Project:
Ok. Eclipse restarted ok, but is everything working. I certainly encountered some pain while trying to get things working appropriately, so I will lay out steps to hopefully give you the best chance of success.
The first items to check after the plugin install, is the Tern configuration under global preferences. Go to Window --> Preferences under Eclipse. Unlike what you will see in the plugin startup documentation, the Tern configuration is now present under the JavaScript node. Expand the JavaScript node, then the Tern node, and then the Development node. Click on the Repository item and then make sure that the AngularJS checkbox is selected in the list. If it is not, select it and then click "Apply", and then "OK" to close out of the dialog.

Now create an AngularJS project. Go to Eclipse and create a new "Static Web Project". You could also use the "Dynamic Web Project" if you wanted, but it really isn't needed for an AngularJS front end application. From the Eclipse main menu select File --> New Project, expand the "Web" node and select "Static Web Project". Click "Next" and then provide a name for your project, keep the defaults, and then click "Finish". After creating the project Eclipse will prompt you to change to the "Web Perspective", click "Yes".
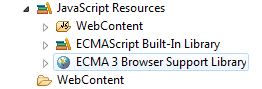
At this point you should have a project within Eclipse that resembles the following structure:
Now you can create your AngularJS based index.html file. I used the data-binding example that is part of the AngularJS website documentation, https://docs.angularjs.org/guide/concepts .
  <!doctype html>
  <html lang="en">
  <head>
  <meta charset="UTF-8">
  <title>Example - example-guide-concepts-1-production</title>


  <script src="//ajax.googleapis.com/ajax/libs/angularjs/1.5.3/angular.min.js"></script>

</head>
<body>
  <div ng-app ng-init="qty=1;cost=2">
  <b>Invoice:</b>
  <div>
    Quantity: <input type="number" min="0" ng-model="qty">
  </div>
  <div>
    Costs: <input type="number" min="0" ng-model="cost">
  </div>
  <div>
    <b>Total:</b> {{qty * cost | currency}}
  </div>
</div>
</body>
</html>
You can create the index.html in root of the WebContent folder. You can see in the example that it is referencing the angular.js script library through the google api url. You can leave as is, or as I did download the angular.js library and place within a lib folder under WebContent. Make sure to change the src attribute of the script tag to point to the appropriate relative location. If you hover over any of the ng tags and see descriptions of the tags coming back then you now everything is working appropriately with the plugin. You can also try auto completion by typing in the index.html page ng- and see if the angular tags pop up.
Deploy
You will fine multiple posts about using embedded http server with Node.js, livereload, webjars and other technologies to help automate deployments. I prefer to start simple and down the road look at ways of automating or enabling hot deployment. You can get lost trying to figure out what is going on in some of the other posts. Just keep in mind that it is all javascript, so all you need to do is serve it up from a web server. Also just make sure your example files are referencing the angular or other javascript libraries you include in your examples appropriately. As I stated in the beginning, the goal was to deploy to Tomcat (any other web server/web container should work). So to accomplish that I simply:1) Copied everything present in my WebContent folder in Eclipse.
2) Created a folder in webapps under TOMCAT_ROOT on my system (/apache-tomcat-7.0.67) representing the name of my new example project, i.e. my-angular-demo.
3) Past all the files copied in step 1 into the new project folder created in step 2.
4) Start up your tomcat instance. I am not detailing out how to install or start Tomcat. There is plenty of documentation available on the web for installing and configuring tomcat.
5) Open up a browser and try out your new AngularJS app by hitting http://localhost:8080/my-angular-demo/
Voila! Everything should be working.
Subsequent post may cover features/usefulness of AngularJS (a Java Developer's perspective) and further notes on slicker hot deployments from Eclipse or other build tools. Please feel free to post comments or suggestions.
Nice simple sample. I always wanted to use angular in a traditional MVC app for data. angularjs development
ReplyDeleteI really appreciate the information shared above. It’s of great help. MaxMunus provides Remote Support For Corporate and for Individuals. If anyone is facing any issue in his project of # ANGULAR JS we can support them remotely , kindly contact us http://www.maxmunus.com/contact
ReplyDeleteMaxMunus Offer World Class Industry best Consultant on# ANGULAR JS. We provide end to end Remote Support on Projects. MaxMunus is successfully doing remote support for countries like India, USA, UK, Australia, Switzerland, Qatar, Saudi Arabia, Bangladesh, Bahrain, and UAE etc.
Saurabh
MaxMunus
E-mail: saurabh@maxmunus.com
Skype id: saurabhmaxmunus
Ph:(0) 8553576305/ 080 - 41103383
http://www.maxmunus.com
As a beginner in angularjs development your post is very help full. Thanks for your informative article. If you guys interested to learn agularjs.
ReplyDeleteangularjs development company
very informative blog and useful article thank you for sharing with us , keep posting AngularJS4 Online Course
ReplyDeleteThis comment has been removed by a blog administrator.
ReplyDeleteThis comment has been removed by a blog administrator.
ReplyDeleteThis comment has been removed by a blog administrator.
ReplyDeleteNice Blog, Keep sharing your ideas and information.I would like more information about this, because it is very nice...Thanks for sharing. Thanks a lot
ReplyDeleteAnika Digital Media
seo services in UK
web design development company in UK
Nice reading, This very good information, thanks for sharing this blogs. AngularJS Web Application Development Company provide the best services like AngularJS QA & Testing, Cross-platform development, custom website solution, data binding with localization and app design & development, etc .
ReplyDeleteThis comment has been removed by the author.
ReplyDeleteNice Blog , This is what I exactly Looking for , Keep sharing more blog .
ReplyDeleteOffshore Angularjs 2 Developers in India
I found your this post while searching for information about blog-related research ... It's a good post .. keep posting and updating information.
ReplyDeletebuild taxi app
Interesting topic for a blog. I have been searching the Internet for fun and came upon your website. Fabulous post. Thanks a ton for sharing your knowledge! It is great to see that some people still put in an effort into managing their websites. I'll be sure to check back again real soon.
ReplyDeleteSaaS Application Development Company
Mmorpg
ReplyDeleteİnstagram takipci satın al
tiktok jeton hilesi
tiktok jeton hilesi
Sac ekimi antalya
İnstagram takipçi satın al
Instagram takipci satin al
METİN2 PVP SERVERLAR
takipci satin al
Yeni perde modelleri
ReplyDeletesms onay
mobil ödeme bozdurma
nftnasilalinir.com
Ankara Evden Eve Nakliyat
Trafik sigortasi
dedektör
web sitesi kurma
AŞK ROMANLARI
smm panel
ReplyDeleteSmm Panel
iş ilanları
İNSTAGRAM TAKİPÇİ SATIN AL
hırdavatçı burada
Www.beyazesyateknikservisi.com.tr
Servis
TİKTOK JETON HİLESİ İNDİR
pendik bosch klima servisi
ReplyDeletemaltepe daikin klima servisi
kadıköy daikin klima servisi
kartal beko klima servisi
beykoz lg klima servisi
üsküdar alarko carrier klima servisi
üsküdar daikin klima servisi
pendik toshiba klima servisi
maltepe alarko carrier klima servisi
Nice Blog , This is what I exactly Looking for , Keep sharing more blog .
ReplyDeleteAngularJS for Growing Startups
Great Post. Also visit.
ReplyDeleteride sharing app development
NFT marketplace development
car wash app development
cryptocurrency app development
IT company in Dubai
logistics app development company dubai
laundry app development
social media app development